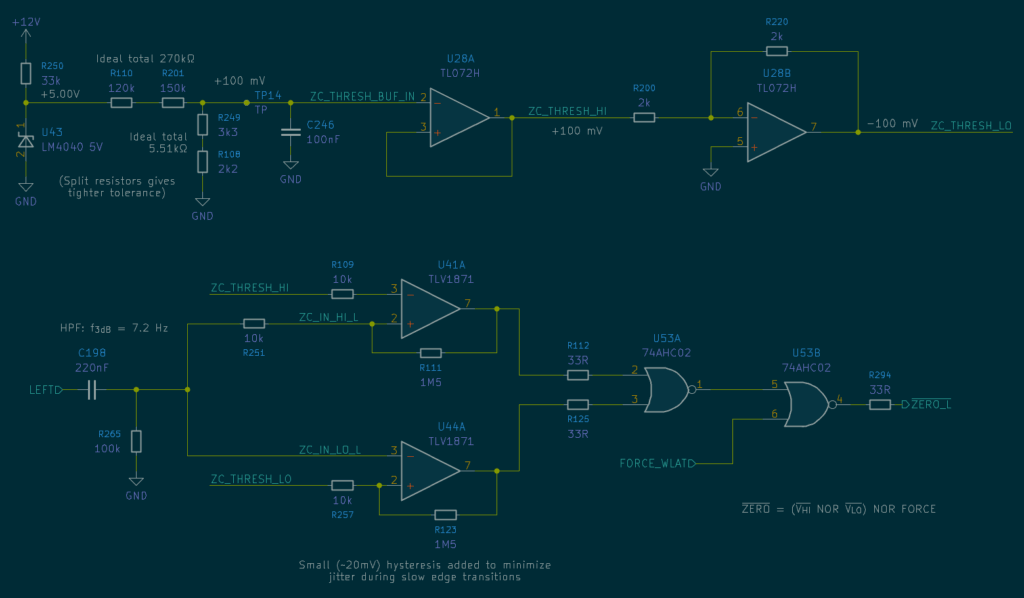
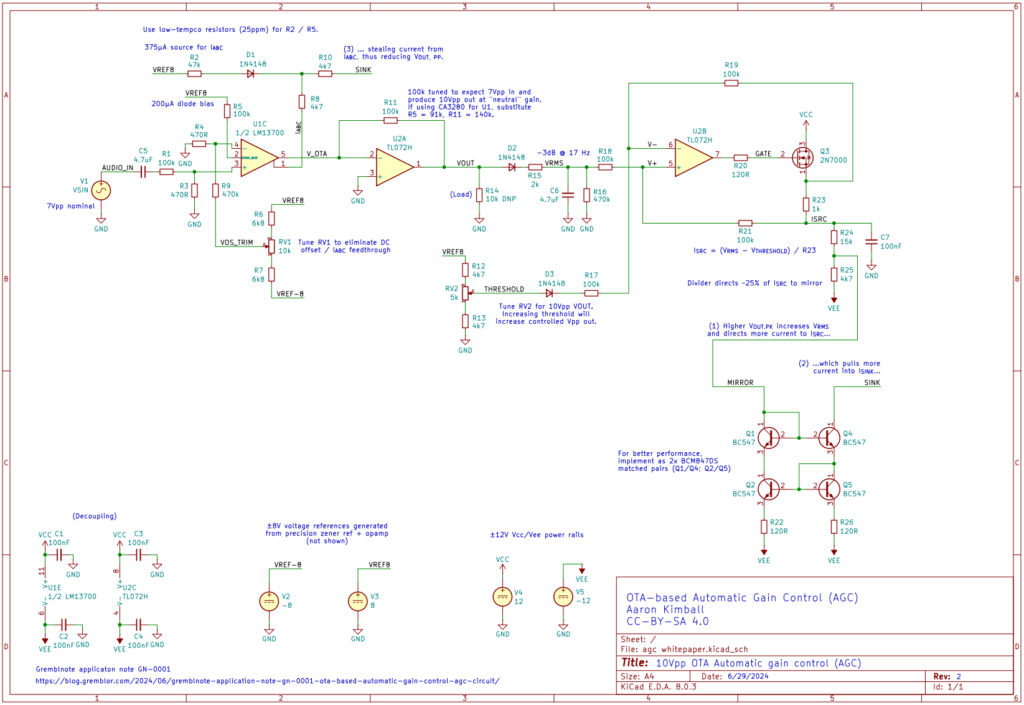
Precision current reference – part 2
In Part 2 of the Precision Current Reference build, I assembled and calibrated the instrument and tested it out.
A precision current source like you’d find in an SMU would be a very helpful tool for some of my other projects. But an SMU costs an arm and a leg… my needs were not so great. Could I make what I needed without breaking the bank?
Over the past year I’ve gotten into building modular synth components. There’s a lot more to share on that front; I’ve put together several modules and have a plan for several more to go into an integrated system. The relative complexity means there’s a lot to write about, though, which has made me keep putting it off…
In the meantime, I completed a smaller project this weekend—a breakout board that makes it easier to develop audio circuitry on a breadboard.
I recently got in a discussion on the Slack associated with the Hacking SaaS substack. (Which if you’re in the industry, you should definitely read!) The question was about what kinds of tools you should feel comfortable using if you’re an engineer at a SaaS business. The conversation then turned to the nature of: what …
In a recent blog post I described building a more powerful EL-wire driver based on the 555 timer. That was in service of a small art project which I finished last week, “Luminous Gates.”
I built my own circuit to handle conversion of 6 VDC power from the batteries to the 2 KHz AC power required by EL-wire.
My latest gadget is a Wifi spectrum analyzer. Built on the Wio Terminal by Seeed Studios, it was a simple embedded device to set up.
I recently designed a custom case to fit a Raspberry Pi 4 and a 7″ LCD screen. I wanted a small tablet-like computer I could set up to look at while seated at a table, or standing at a counter in the kitchen.
After some more procrastination, it was time to wrap this up. I was, in fact, able to get this successfully wired up and mounted on the boat! All in all, I had a great time making this project and learned a lot.
All the pieces have come together. It’s time to hook this up on the boat and see how it works!