
This is the seventh post in a series about building an embedded electronic device to assist in sailboat racing.
Marine electronics project — table of contents
- Project background
- The platform
- A digression on suppliers…
- The software
- Power and packaging
- Fabrication and assembly
- Mounting and installation (take one)
- Installation (take two) — Success!
All the pieces have come together. It’s time to hook this up on the boat and see how it works!
Mounting
My plan was to mount the finished device on an arm attached to the guardrail on the front of the steering pedestal:

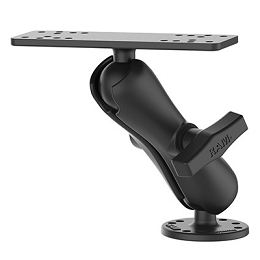
For this purpose, I turned to RAM mounts. They have a mix-and-match system that included a base that could clamp around the guardrail, an arm, and a base plate specifically aimed at marine electronics. Their equipment is very sturdy and weatherproof.
The case has flanges on the side with pre-drilled holes, but that base plate isn’t quite wide enough to match to them. I made an adapter plate by ordering a piece of starboard (marine HDPE) cut to size by TAP Plastics.
HDPE is easy to drill and I added two sets of holes, one to match with the Polycase and the other set to match with four holes in the RAM mount. This might have been the most straightforward part of this whole process.
Installation (take 1)
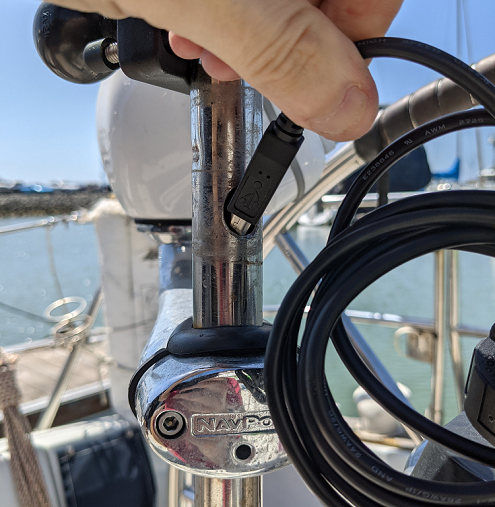
Of course, actually installing anything onboard a boat is more trouble than you think it will be. My guardrail already had a hole in it left over from the cables for a prior electronic device, which I planned to reuse. However, I found that it wasn’t quite large enough to admit the USB-B connector through it!
I didn’t feel like cutting the connector off the cable and soldering it back on again once the cable’s pulled into the boat. I can open the hole up more with an angle grinder though. Then that gets to another problem: the bottom of the guardrail where it meets the deck is filled with sealant! The existing NMEA cable routed through the guardrail there goes through but there’s no space for additional cables. And removing the guardrail to clean out the bottom would be straightforward — but reattaching the guardrail below-deck would not be so simple; it’s above a sort of crawlspace 3″ tall between the deck and the engine compartment, and I don’t know how to reach in far enough from the lazarette to actually fasten the nuts on the guardrail foot bolts. (Even getting myself into the lazarette to take a look into the crawlspace was an adventure in contortionism.)
I then ordered a pair of cable glands to attach at the binnacle base. But installing those requires drilling through the deck, which makes me a bit nervous. And while the N2K hookup is obvious and easily accessible, I still haven’t actually figured out where to attach the power cable to the +12V and GND busses for the “Instruments” circuit.
This has already represented several trips to the boat with my tools and I had basically no progress to show for it after 3 months of off-and-on-again installation attempts. The sailing season for the year is wrapping up soon and I really wanted this project Done. It was at this point that I broke down and called a professional marine electrician.
Just kidding. I made a few inquiries but didn’t get a response. Unless you’re in the commercial fleet, or want to get a lot of work done at once ($$$$), they’re too busy to respond. So of course I then put this project aside for a while again…